History of Japanese Indigo Dyeing
Indigo dyeing in Japan uses “Tade-Ai plants (a type of Indigo plant, its academic name is “Persicaria tinctoria.”)
According to some historical studies, Tade-Ai was native to Southeast Asia and they say that it was transmitted through the Silk Road in the end of the Kofun Period (BC 300) and then passed through India, China and Korea to Japan around 6th century.

Indigo dyeing in Japan was very active done in Tokushima prefecture during the Edo period(1603-1867).
The vivid and deep indigo color (blue) was praised and even called “Japan Blue” by foreign visitors in Meiji period (1868 -1912) after Japan reopened the country to foreign trades and diplomatic relations.
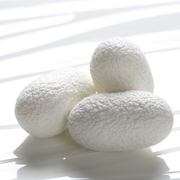
Indigo dyes well on fabrics made from natural materials such as silk, hemp, cotton, and it also has effects of deodorant, insect repelling, and snake proof.
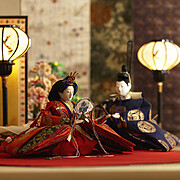
A wide range of items including clothing such as kimono, as well as towels, Noren (shop curtain), bedclothes, and religious books were dyed with Ingigo.
In indigo dyeing, the more number of times fabrics are soaked in indigo liquid, the darker indigo colors turns out.
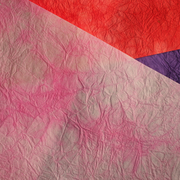
Japanese people cherished different types of blue colors by giving traditional names such as "Mizu Asagi" for light indigo blue, "Nando" for slightly darker blue with greenish color, "Ai" for standard indigo blue, and “Chika Iro” for darker indigo blue.
There used to be indigo dyeing shops called “Kouya in many regions to produce indigo dye goods.
However, since early Showa period (1926-1989) when synthetic indigo dye technologies emerged, handmade indigo dyeing culture declined due to its time consuming and labor intensive processes.
Thus, most Indigo-colored jeans are now dyed with synthetic dye materials.
Traditional Production Processes of Indigo Dye Solution
It takes 4 to 5 months to complete the making of indigo dye solution from reaping Tade Ai plants.
S tep 1
Sow Tade-Ai plants in spring and reap them in early summer.
Then, dry and chop them into pieces around 1.5cm.
S tep 2
Pour water over cut leaves and pile them up high, and leave them for approx.3 months in the building called “Nedoko (brewing room).”
Along with good care such as watering and stirring by monitoring weather and temperature of each day, the temperature of the heap goes up and steam comes out, which is a sign fermentation is in progress .
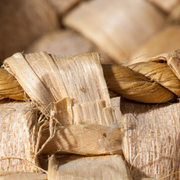
This fermentation state is called "Sukumo (fermented Tade-Ai)”
Step 3
In order to turn Sukumo into dye solution, add water, Sukumo ,lime, ash, wheat flour, sugar, alcohol, and some other ingredients into large ceramic pots called “Aikame” embedded in the ground, and keep the temperature around 30 ℃(86°F).
When microorganisms start working, fermentation progresses further with the compost-like smell.
Leave it for approx. one week to complete this process.
At the dyeing floor of a traditional Kouya, ceramic pots containing dye solution are placed around the heating pot called “Hitsubo” in order to control the temperature of dye solution.

S tep 4
When bubbles rise on the surface of dye solution, it is a sign that dye solution is ready.
This is the state called "indigo flowers are blooming".
A series of processes to prepare indigo dye solution is called "Ai-date (brewing indigo dye solution) or "Ai-o-tateru (to brew indigo dye solution)".
Although brewing processes of indigo dye solution vary depending on regions and individual craftsmen, every dyer fully uses five senses for fine tuning of dye solution by visual checking, hand touch, smell or sometimes taste the alkalinity by sipping.
As you can see, Japanese indigo dyeing was truly supported by craftsmanship.
Finished Sukumo is used in dyeing process as is, or dried out and crushed into power then solidified into round shape called “Ai-dama. (indigo balls)”.
By solidification, storing and transporting to distant places were made available.
During Edo period, indigo balls were traded and used in Kouya shops (indigo dye shops) throughout the country.
As you have seen so far, traditional production processes of indigo dye solution takes time, energy and affection just like baby-sitting: put a blanket, serve water, roll over, warm up and feed, etc.
How to dye
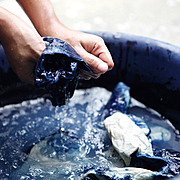
Immerse yarns or fabrics of natural materials in indigo dye solution all at once.
Then, squeeze dyed items to drain and wash them in clean water while exposing them the air.
At the beginning, dyed items look yellowish green, but oxidation of dye solution makes it blue.
Furthermore, by repeating dyeing and washing processes, the color turns from light blue to darker indigo blue.
If you tie portions of a fabric or garment you do not want dye before immersing into dye solution, the tied portions remain white that look like patterns.
This is called “Shibori Zome (tie-dye)
Draw a figure on paper and cut it out, then attach it on to a fabric with resist paste.
Then immerse it in dye solution. Only the glued portion remains white and stands out from the dyed background.
This is called “Kata Zome (patterned dye.)”
Including many other ways of dyeing, indigo dyeing provides a variety of expressions in different forms.

Interestingly, the modern scientific analyses have proven that these complicated and time-consuming production methods of indigo dye solution and crafted ways of dyeing logically make sense.
As you can imagine, indigo dyeing had evolved without industrial technologies that were not available at that time.
Indigo dyeing methods were developed with efforts of craftsmen who continuously studied and tested with many trials and errors to find out best practices, from generation to generation.
You may find the Indigo dye culture inspiring.
Future of Indigo Dyeing
Indigo dye is designated as an Intangible Designated Cultural Asset in Japan, and indigo dyeing craftsmen throughout the country have maintained the culture to date.
However, the needs for kimono or other fabrics that require traditional indigo dye have been declining.
As such, some indigo dyeing craftsmen in recent years are extending the areas of indigo dyeing to modern items such as sneakers, T-shirts, bags and other casual items while preserving the tradition.
In addition, there are some artists who introduce indigo dyeing techniques to their contemporary art works.

Having learned the long history and traditional dye processes, from now you may see the indigo blue color in indigo dye goods at deeper levels with different viewpoint.
Visit and Experience Indigo Dye
In Tokushima prefecture where indigo dyeing was active, there are several indigo dyeing museums and studios that allow you to experience indigo dyeing.
How about visiting one of them to see the real indigo colors, smell and touch of indigo dye works?
P laces for Experiencing Indigo Dyeing
【Ai no Senmon Hakubutukan (House of Aizumi History Museum, indigo)】
※ Indigo workshops available at Ai no Yakata (House of Azumi)
Address: Maezunishi-172 Tokumei, Aizumi-chō, Itano-gun, Tokushima-ken,
771-1212, Japan
【“Exhibition and work floor of Mr. Takumi Kagawa, certificated technician of Awa-style Pattern Indigo Dyeing”】
* Indigo dye workshop available at Ai-zome Kogeikan
Address: Nishikawabuchi-81-1 Ōjinchō HigashisadakataTokushima-shi, Tokushima-ken 771-1154, Japan
【“Indigo Dye Factory of Mr. Riichiro Furusho, Intangible Cultural Asset, National Selection Award of Excellent Techniques”Indigo Dye workshop available at Furusho Some-Kojo (Furusho Dye Factory) 】
Address: 9-12 Sako ShichibanchōTokushima-shi, Tokushima-ken
770-0027, Japan